Here’s my second Elizabeth Hartman Perfect Quilted Tote available as a pdf pattern. The pattern includes instructions for two sizes: a tall tote measuring 14½” tall x 10½” wide and a wide tote measuring 11½” tall x 12½” wide. Again, I chose to make the wide tote .
Here’s where it started – my pile of inspiration. Hard for me to stay away from these colors. There’s quite a mix of stuff in here: Mixteca by Eleanor Grosch, Denyse Schmidt’s Jo-Ann’s fabric, Violet Craft’s Waterfront Park, Birch’s Elk Family, Lucie Summers’ Summersville, and more.
Here’s side 1. For the solid fabric I used the Yarn Dyed Essex in black.
Here’s side 2.
Had a lot of fun making this! It will probably end up as an auction item for my son’s school.
I picked up this fox cute pattern by McKay Manor Muses and the cuddle soft fabric at Craft Warehouse a little while ago. Got the safety eyes and nose too. With my tree skirt finished, I wanted to try something different. I have made some stuffed animals for my son before, but they were pretty basic, along the lines of an Ugly Doll. I was excited to use the plastic pellets in the paws and tail that gives many store-bought stuffed animals that nice weight and drape. I also really liked the fiber fill I used, a new product from Pellon called Perfect Loft. It’s soft but structured and doesn’t clump or bunch like regular stuffing.
The pattern instructions were well-written and easy to follow. They include a lot of good tips about sewing with cuddle fabrics.
Here’s my completed fox listening to “What Does the Fox Say?” on YouTube.
Here he is on the mantle. He is awaiting a scarf which I am in the process of knitting.
My son likes him posed as Psy doing Gangam Style. This little fox will probably soon join his menagerie known as the Tri-Castle Area.
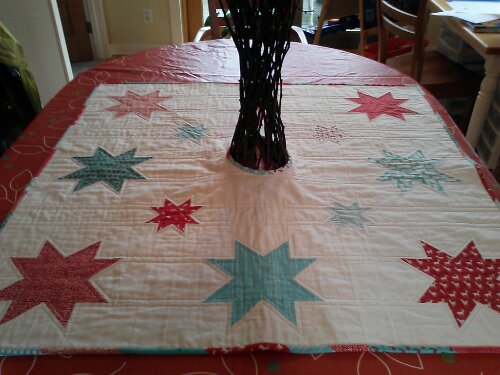
I finally finished my Christmas Tree Pants (Skirt) from Happy Zombie‘s great tutorial you can find here.
It all started back in January 2013, when I challenged myself to have this done for Christmas 2013. Well, I met my goal and it’s not even Thanksgiving!
Here’s it pieced before making the quilt sandwich.Here’s the finished product 11 months later.
I’m pretty happy with it. It’s better than the bed sheet I’ve been using the last couple of years and the Martha Stewart skirt from K-Mart that just didn’t do it for me anymore.
Of course, there is always wonky-ness, but that’s how it goes. I cut the scappy binding on the bias because I had never bound anything with curves. Worked out great.
The quilting I would have re-thought. I like the echo quilting around the stars, but some of the straight line quilting is a little boring. This is where my fear of free-motion quilting limits me.
Looking forward to using this under the tree this year!
Here’s a cute zippered toiletry bag I made completely on the serger! This is one of the practice projects included on the Beginner Serging: Machine Basics and Techniques class I’ve been watching on Craftsy taught by Amy Alan of Really Handmade.
I chose this very sweet octopus fabric from the Coastal Mini Series by Timeless Treasures. For this project, all you need is 2 fat quarters, a zipper and some fusible fleece. The finished bag comes out to be about 9″ L x 5.5″ W x 5.5″ H. I could really get into making a lot of these.
As it seems to be going with all of my recent summer sewing, I have been spending a lot of time with my seam ripper! This little project was no exception. The serging part was a breeze! What set me back was the zipper. Toward the end of the project, when I trimmed my zipper end off flush with the bag, I wasn’t paying attention and the zipper pull came off the end of the zipper. I could not get it lined up and back on the teeth. So…I took the whole thing apart. And when removing serging, that’s a lot of thread.
I think with a little more practice there are a few things I could improve on this bag. One: my zipper seams are not even along the teeth. It is a little wonky. Second: one of my end tabs is not completely centered at the base of the zipper. But, all in all, it’s pretty darn cute. I hope to make some more using fat quarters I’ve been holding on to but just don’t know what to do with.
A couple years ago, I received a Bernina serger for Christmas! I dutifully took the new owner classes offered at my local shop, but was still so scared of the thing that I haven’t touched it much since. I did make a skirt, which came out great, but that’s it.
Several months back, I purchased Beginner Serging: Machine Basics & Techniques with Amy Alan on Craftsy. My local sewing shop only offered introductory serger classes sporadically. With my schedule and limited time, I needed something I could do from home whenever I could squeeze it in.
Well, I finally just got to start to watching and this class has been great for building my confidence! Luckily, Amy is using the same machine as me. So that helps simplify things. I’ve gone through the basic stitch lessons and am now learning some decorative techniques. The class also includes three projects to sew along with – a zippered toiletry bag, an apron and a scarf.
But I was so excited about what I learned so far, I decided to take a break from class and make a simple garment with my new skills.
I decided on Kwik Sew K3602. I’ve always had great luck with Kwik Sew patterns. I like how they are printed on paper not tissue and the instructions make sense.
Kwik Sew K3602
I recently picked up $6/yard Valori Wells flannel at Craft Warehouse and decided to use it to make these pajama bottoms. They’re turned out a little big. I was torn between making the size S or M. I have a medium waist, but small hips. So, I decided to go with the M.
Here’s a close up of my serging on one of the leg seams. It just feels good to be using this machine and not being as scared of it as I was. I hope to make more garments and conquering my fear of the serger will get me going in that direction.
Up next on my garment to-do list is the Grainline Studio Scout Woven Tee. Here’s the fabric I’m going to use — a print from Robert Kaufman’s London Calling 3 cotton lawn collection.
Celebration from London Calling 3 by Robert Kaufman
Awhile back, I had the privilege of helping to make the small version of this basket out of Full Moon Lagoon for Mo Bedell‘s Quilt Market booth. I became hooked on these! They are super fun and easy to make. You can find the tutorial here on Pink Penguin’s blog.
Here I used some left over scraps from the baby quilt I recently made for my son’s teacher. I thought she could use this little basket for diapers or other baby sundries. The fabric here is Sarah Watts’ Timber & Leaf. The solid is Essex Yarn-Dyed Flax.
Here’s another one using some of my favorite orange fabrics including Denyse Schmidt, Comma, Carolyn Friedlander, Joel Dewberry and Dear Stella.
These are a great way to use up your scraps and make something useful at the same time!
I had been curious about the “quilt as you go” technique. I loved the look and some sewing friends said it was so easy. To try it out, I needed a project. So, I purchased Elizabeth Hartman‘s Perfect Quilted Totes available as a pdf pattern. The pattern includes instructions for two sizes: a tall tote measuring 14½” tall x 10½” wide and a wide tote measuring 11½” tall x 12½” wide. I chose to make the wide tote.
Here’s the technique in process. It is so much fun! Elizabeth’s instructions are very clear and easy to follow. It works out well to select a couple fabrics with large motifs that you can fussy cut and use as focal fabrics, such as the typewriter fabric by Julia Rothman on the example above, for the quilted panels. The typewriter fabric helped me decide on my blue, orange and grey color scheme.
Here’s the finished tote! I am really pleased with how it turned out. The inside includes 2 pockets, one with a zipper, and a magnetic snap. For my solid fabric for the body of the tote, I used Essex cotton/linen blend in Grey. Inside, I used Kona Cotton in Bahama Blue.
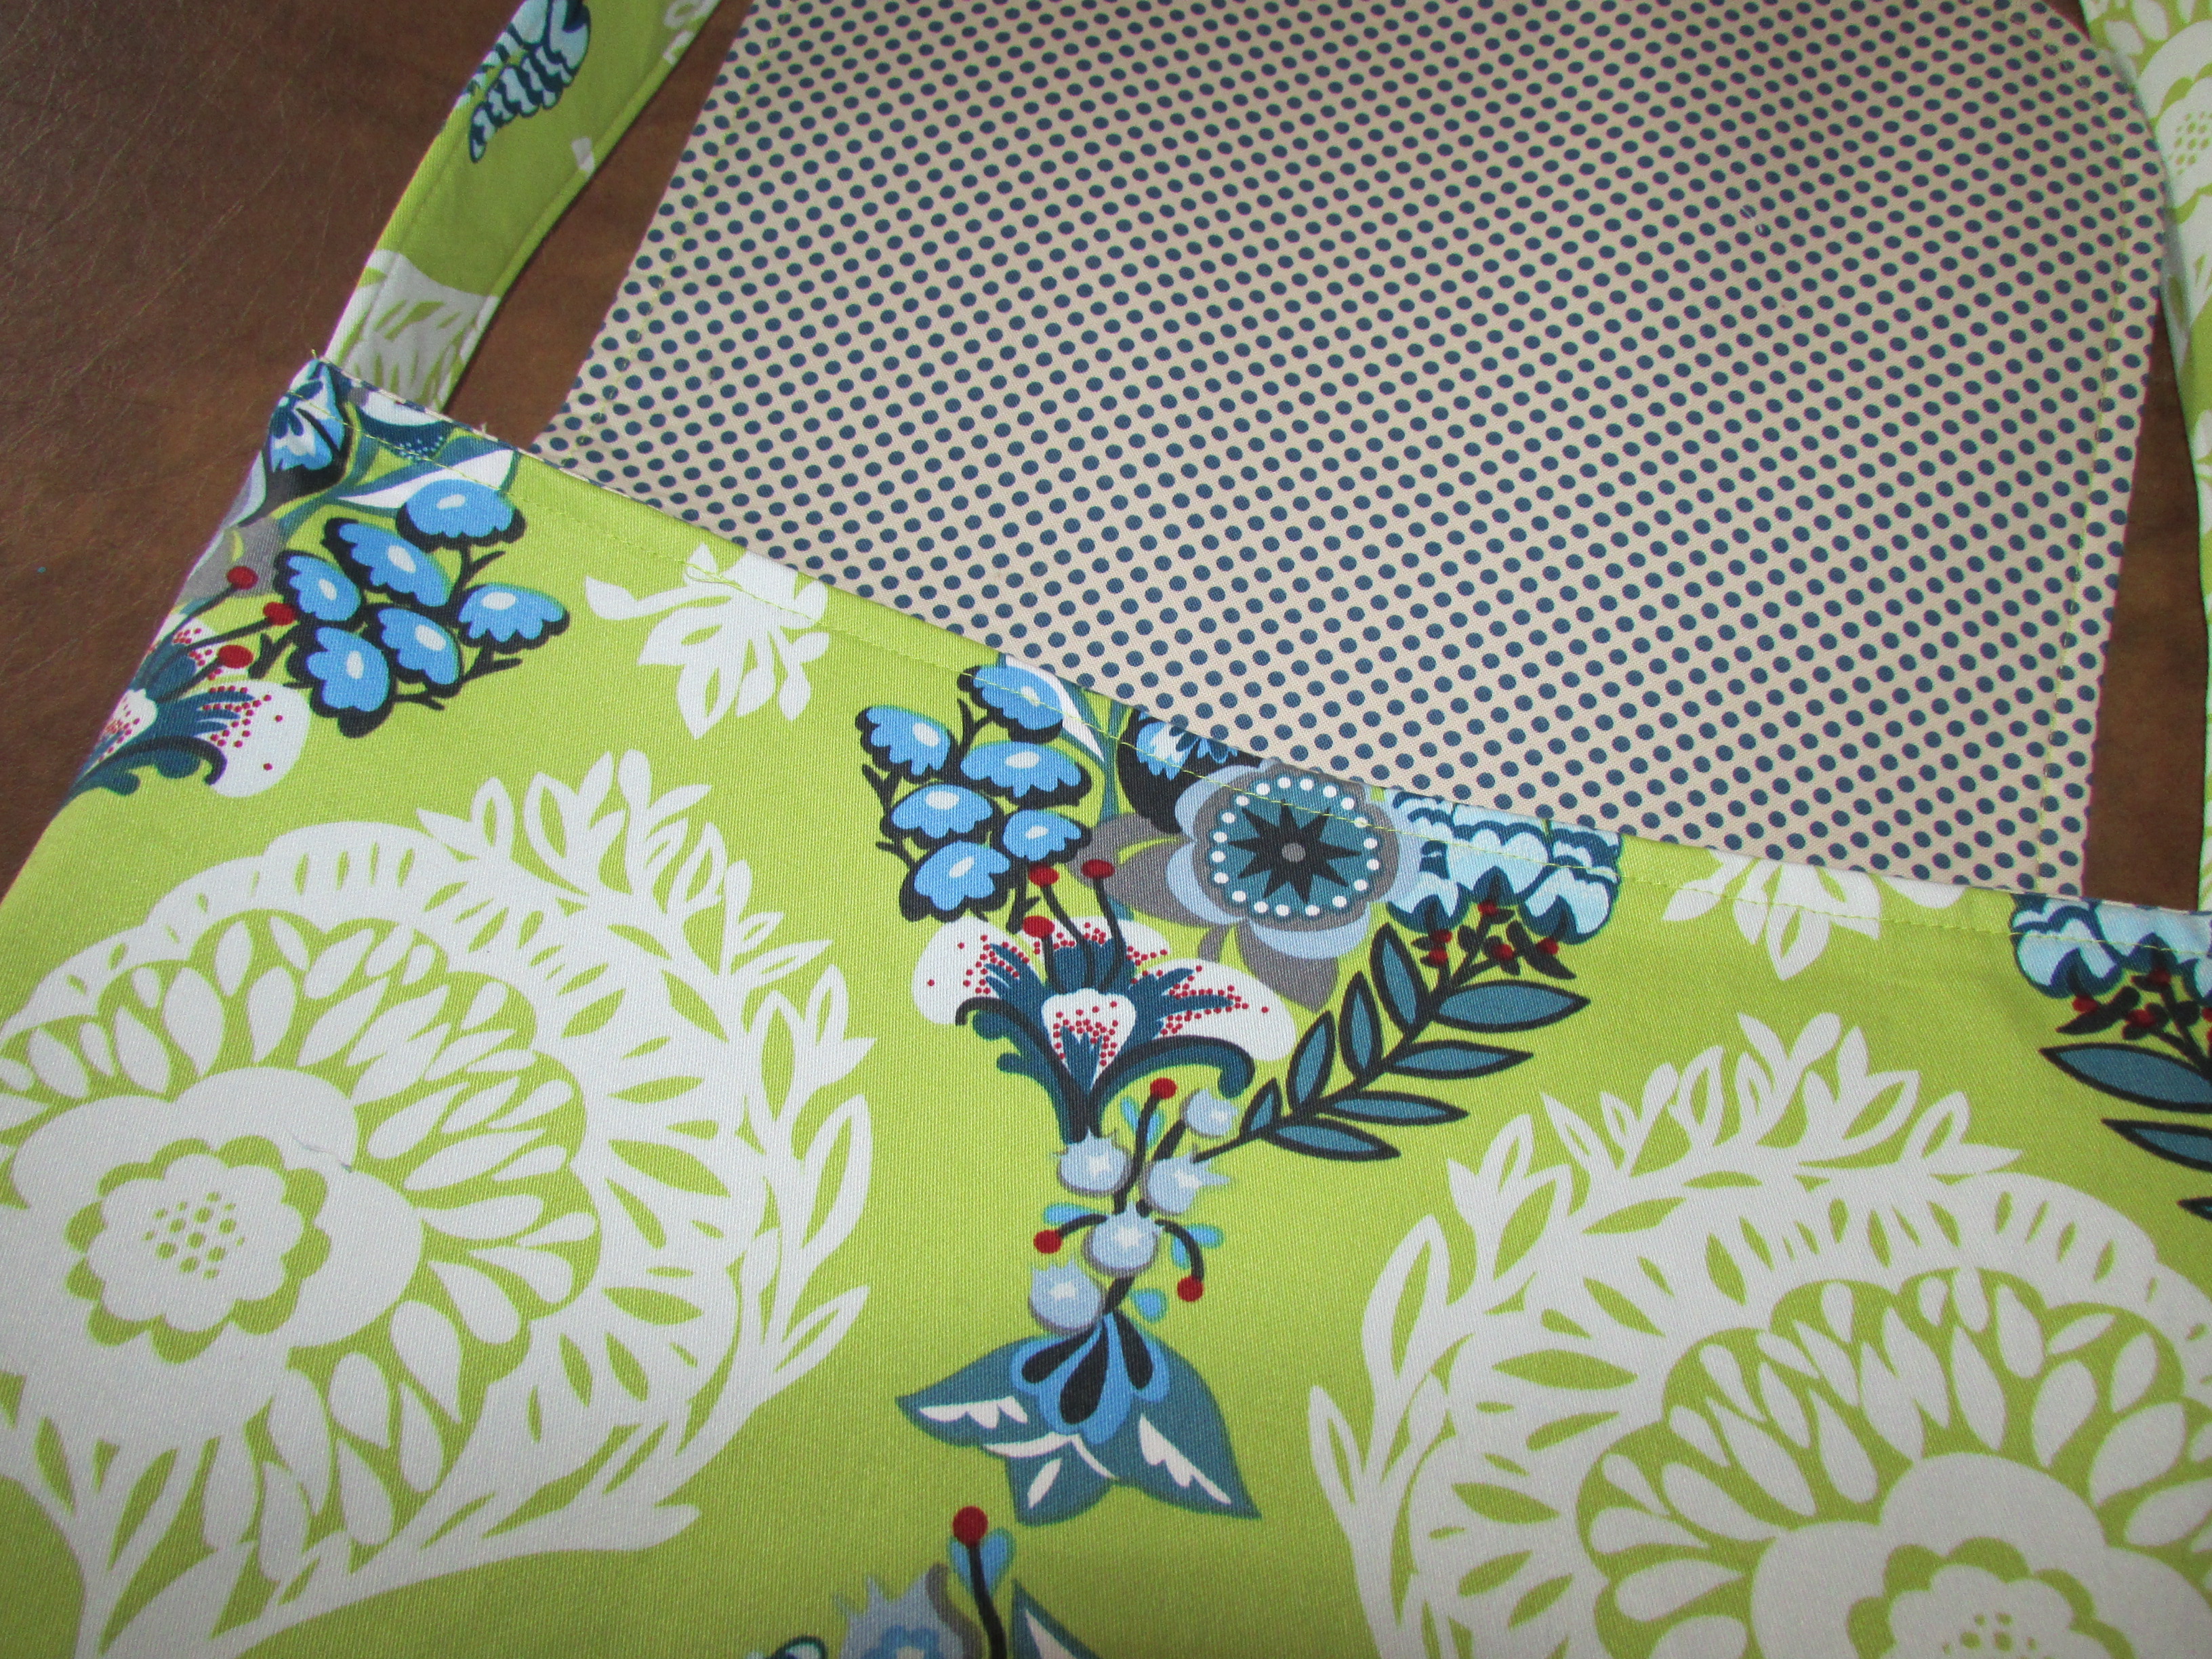
I love messenger bag style purses and was excited to try out Jen Gidden’s Classic Messenger Bag pattern. I have made her Pleated Tote pattern and really liked it. Very simple and clear instructions.
I used decorator weight Lovesme Lovesmenot in Leaf from Anna Maria Horner’s Innocent Crush collection.
For the inside lining, I used a polka dot from American Jane Patterns from the Look and Learn collection by Sandy Klop. There is just a simple pocket inside, but you could really customize here adding a zippered pocket or specialized pockets for your phone, etc.
For the interfacing, to give it body, I used Pellon 809 Decor Bond. This made the flap a little stiff. Currently, it looks very nice, but I wonder how it will really stand up to real world use.
All in all, this was a very fun project and pretty much instant gratification, which was exactly what I was looking for!


 Chinchilla Whiskers will be at the Scratch Made Market at the Beaverton Merchant Hall on Saturday, October 17th from 10 am – 4 pm.